Search This Blog

Friday, August 8, 2014

Organization Log #4: BACK TO SCHOOL!!!

It's my favorite time of year! Back-to-school shopping is my favorite shopping. You get to see all these pretty things, and you don't even have to try them on before you buy them! It's just the best. And I only get to do this for two more years, so I have to make it count! 

I've always been really good at organizing myself for school, and at keeping up with it throughout the school year. So these are probably going to be my best organization tips out of any that I've done so far. I'm a pro at this, guys! Let's start with some supplies.

My go-to's are colorful pens and highlighters, a good planner, and sturdy notebooks. And really, I like all of these things to be colorful.


TIP #1: USE COLORFUL WRITING UTENSILS. This makes note taking so much fun, and you can separate your colored notes by subject or day and find them so easily. Check it out.


I change pen color every time we start a new chapter or subject in each class. I get so weirdly excited about looking at my beautiful notes. Now, when I'm taking notes in class I only use a yellow highlighter, because it shows up well on all of my colored pens. I highlight what seems important.

When I'm studying for an exam, I then look over my notes and rewrite the things I need to remember in black pen, then highlight things in different colors for different categories.


For example, in this class I used three different colors to denote which sections were from the professor's study guide, and which were from my notes or from the textbook. That way I could easily cross reference, and it also helped me rank which sections were most important (obviously the stuff from the study guide, as the professor gave it to us herself).

TIP #2: A GOOD PLANNER IS A MUST. I know a lot of people use their phones or email or whatever, but for me, I've always been about dat agenda. Physically writing a task down is associated with better recall of that task later (this goes for note taking too, for all you laptop note takers out there—you remember the info better if you write it down!).


I love the Lilly Pulitzer planner, which is very, ironically, sorority girl of me. But I have used every agenda out there ever. Seriously. Day runner, day planner, everything, and this is the only one I will be repurchasing. 

A good planner has several qualities. First of all, it needs pockets in the front in case you have something you need to stick in there quickly. Second, it needs both a monthly and a daily planner section. Third, it needs a notes section. This planner has all of those, with plenty of room for writing. 

I use paper clips to mark where I am in my notes, in my monthly planner, and in my daily planner (so three total). I also color code my events based on whether they are for class, for extra curriculars, for appointments, or social. August is looking pretty spare right now. Until we get to orientation week.

I used the multicolor highlighter trick here as well, to denote which orientation events are required vs. the events that were optional that I registered for. And it's so neat and easy to read! As for the notes section, I use that mostly for grocery lists, or any kind of list really. This year I've used it to make a packing list to move and to make a grad school application to-do list. I love having everything in one place!

On to notebooks. Are you a notebook or a binder user? I used binders throughout high school, but switched to notebooks in undergrad because I didn't want all the extra weight if I were going to be walking farther. 

TIP #3: USE REFILLABLE NOTEBOOKS. But notebooks are not reusable, right?

WRONG! Enter these beauties, which are by Five Star, and which I purchased THREE YEARS AGO, and they are still in perfect condition. They are sort of like a binder-notebook hybrid, and come in all sorts of fun colors (or black for you lame-oes out there). They are refillable, but much lighter than a binder. The downside is that they have no pockets, but you can buy insertable pockets for them! 

Weirdly enough, this is the best investment I have made, as my binders usually got so beat up in high school that I had to replace them every year anyway like I would have with a notebook. And the three-ring closures on these are rubber, so no more worrying about pinching your finger in those nasty metal ones. 

TIP #4: HAVE FUN WITH LABELING. With a binder, there was always the option to slide decorative paper in the front with cute hand lettering on there, but no such luck with notebooks. To label mine, I write the subject on printer paper in a metallic sharpie, then tape all four sides down. If I had easy access to cuter paper, I would totally make this more adorable. But it's still sorta cute, right?

TIP #5: USE REINFORCED NOTEBOOK PAPER. Maybe I'm just unnecessarily violent with my notes, but I swear there are always several pages that come completely out of the rings over the semester. And who wants to individually reinforce all three holes on each sheet of paper? No one. Luckily, someone threw a bone to the lazy people by inventing paper that is pre-reinforced. Score!

Let's move on to the desk area.

TIP #6 PART 1: SURROUND YOURSELF WITH FUNCTIONAL THINGS THAT KEEP YOU ON TASK... Here I have yet another calendar so that if my planner is in my backpack or whatever, I can still see at a glance what I have to do in the next few days. 


I also like this little plain whiteboard where I can hang inspirational quotes or jot down something I need to do later.

TIP #6 PART 2: BUT ALSO SOME THINGS THAT ARE JUST FUN. It's nice to be able to look over and see something that will put a smile on your face when you're in the middle of a not-so-fun study sesh. Enter bulletin boards!


I filled my bulletin boards with magazine and newspaper clippings, mementos, doodles, and ticket stubs. Each one of them has a memory attached to it that gives my poor tired brain a nice break from working. My favorite things on my bulletin boards is a comic that shows two adult Kool Aid pitchers having dinner looking proud while their baby Kool Aid runs around wrecking things. This makes me crack up every. Single. Time. 

I'm so excited to begin graduate school. It seems like it'll be really hard, but studying and staying organized is always something that I've been good at, and something that has helped me maintain good grades. Nothing is a substitute for good note taking and study skills, and I hope that some of my tips can help you improve yours if you're struggling, or inspire you to add to them if you're not.

This concludes my organization series! Thanks for sticking with me while I tried out something new :) 

Thursday, August 7, 2014

Organization Log #3: Small Kitchen

Hello friends! Today we discuss the small, sad rectangle that is my kitchen. Here it is.

Cue "awww"s.  It almost seems like this isn't a good picture because you can't see everything. But unfortunately, this is everything. This is the entirety of my kitchen. A singular wall, maybe 10–12 feet, with a stove, one column of drawers, very few cabinets, and no dishwasher. The fridge barely fits on the opposite wall next the the pantry.

But it's just so dang adorable. Even if you don't have a kitchen made for ants, these tips will work in any kitchen!


TIP #1: INVEST IN GOOD DISH WASHING ITEMS. I mean everything. Sponges, gloves, soap, and in my case, an in-sink drying rack (because, again, no dishwasher). Having quality items makes doing the dishes less of a chore, which in turn leaves your sink clutter free! I don't know about you, but there are few things I hate more than a sink piled up with dirty dishes.

I got these gloves from Schnuck's (yes, that is a real name of a real grocery store for all my southern friends out there. Where is the Kroger?? Where is the Publix??), and they are so cute, inexpensive, and functional! I always buy Scotch-brite heavy duty sponges because they have a soft side and a scrubby side (using technical terms here), and they won't break the bank like some of the more decorated sponges. I also exclusively buy Dawn foaming dish soap after using it and loving it at my parent's house. It lasts for freaking ever, and who doesn't love a foamy soap?? It's the simple things, guys.

For anyone who doesn't have a dishwasher or who has lots of dishware that requires hand washing, I would highly recommend a memory foam drying mat. They're washable, better looking than laying out a hand towel, and they absorb enough water that you never have to worry about it leaking through. My mom got me one as a gift for my first apartment, and I used it sooo much.

Unfortunately, I don't have enough counter space to lay it out here, at least not every day, so I invested in an in-sink dish drying rack from Bath and Body Works. In my opinion, they had a better selection than Target did. And it was nine bucks, people. NINE. And it has a nice little utensil holder and plenty of room for plates, pots, pans, and glasses. Oh yes.


TIP #2: KEEP YOUR MOST-USED ITEMS WHERE YOU CAN SEE THEM. My sweet momma bought me this awesome blender, which I have been using the crap out of in the few days I have had it!! I've been wanting for a while now to make a smoothie every morning for breakfast, and now thanks to mom and boyfriend, who bought me an amazing book called "The Smoothie Bible," I can finally do it! Because it's something I use every day, I thought it was worth taking up some of my precious counter space. Also, the smaller book is called "The Bartender's Guide," in case you were wondering.


TIP #3 PART 1: DON'T OVERCROWD CABINET SPACE... Yes, even in a small kitchen. Otherwise, just opening up a cabinet to find something can be overwhelming. Save the stress for something else! Keep it simple and don't over stack. I mean really, how pretty does this cabinet look? And it's not just because of the AMAZING COW BOWLS THAT HAVE ACTUAL UDDERS ON THEM.

TIP #3 PART 2: ...UNLESS YOU HAVE RIDICULOUS AMOUNTS OF ANY ONE THING. In my case, that would be tea.


This cabinet is not nearly as pretty as the other one, but I know my tea collection well enough to not get stressed out by this madness. I also wanted it all in one place for ease of use. So as we see, there are exceptions to every rule. Anyone else a tea addict?


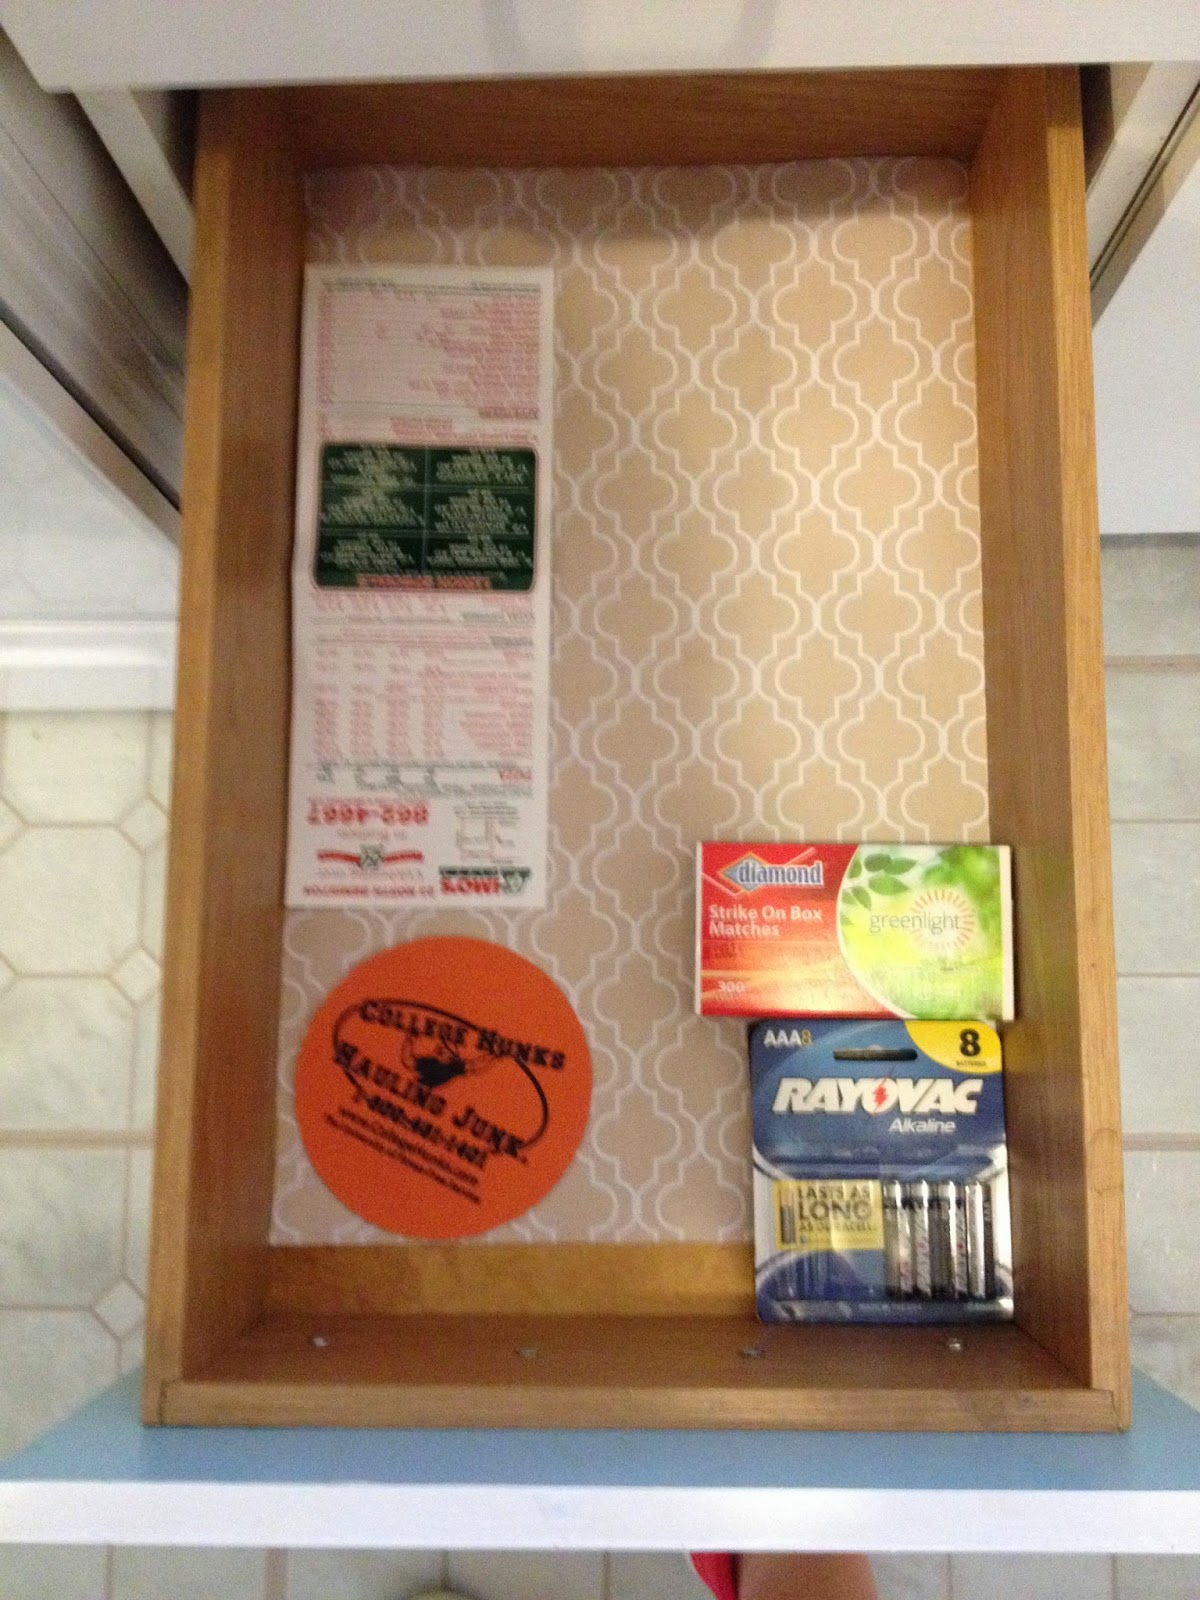
TIP #4: USE SHELF PAPER. A lot of times, especially in super old buildings from the 1920s, drawers and cabinets can get pretty worn and nasty looking. Enter shelf paper, which does not necessarily have to have an adhesive back, and which (apparently) comes in scents...I stuck with good ole non-scented, but regardless, this just gives you a nice clean base upon which to lay your utensils and knives and, you know, batteries and matches and takeout menus.


Okay, so let's dive into my pantry, which, thank JEEBUS, is actually quite large.

TIP #5: PUT THE HEALTHY STUFF ON EYE LEVEL. You may have to enlarge the picture to see, but the eye-level shelf has veggies, soup, and healthy snacks. In my case, that means lots of almonds and kind bars, and a large variety of canned vegetables and Cambell's soups. Yum :)

Along the same lines, I put all the carb-y terrible things on the top shelf. Out of sight, out of mind right? Hah, like I ever forget about macaroni and cheese.

TIP #6: PANTRY DOES NOT HAVE TO BE "FOOD ONLY." That will probably mean something different for everyone. For me, it means that everything that didn't fit in my ant-kitchen goes in here, because I have tons of space. My toaster, which I don't use very often, tupperware, alcohol, and measuring and cooking spoons all live in the pantry. They can even *gasp* share a shelf! I know, I'm a mad man. I am also keeping my tools in here (in the shoe box next to the toaster) because it's just an easy-access spot in my apartment.

That's it for today friends! No real "grand total" here, because it's mostly made up of things you'll already have for your kitchen. Look out for a very exciting back-to-school organization post, which I will likely lump in with my office organization. Does anyone else love back-to-school time as much as I do?? Even as a grad student, I am still getting excited. CAN SOMEONE GET ME TO A STAPLES IMMEDIATELY PLEASE.

Till next time...

Tuesday, August 5, 2014

Organization Log #2: Small Bathroom, Linen Closet

Welcome back to my organization series! Today, we're going through my bathroom and linen closet.

Weirdly enough, even though my apartment is huge, there are a lot of small spaces in it. Many of the closets are large, which is absolutely fabulous, but the kitchen, bathroom, and bedroom are all teeny tiny. So here we go with some more small space organization...


TIP #1: USE OVER-THE-TOILET STORAGE. As you can see, I have zero cabinet space under my sink. In fact, the only storage I have built into my bathroom is a small medicine cabinet on the wall opposite the sink. I opted for over-the-toilet shelving. You can get super fancy looking wooden shelves for around $100, but to me that's ridiculous, so boyfriend and I picked this one that has a shiny chrome finish and was only $30 at Bed, Bath, and Beyond.

Any over-the-toilet storage is going to be a little more expensive, but to me it's worth it because I can definitely use the extra space! Not sure how intense this assembly was, as boyfriend and dad put it together, but I didn't hear any yelling or cursing, so my guess is it wasn't so bad!

TIP #2: SPLIT UP BELONGINGS INTO SMALLER BINS IF POSSIBLE. Having loose things just lying around stresses me out. I like to have them all contained and organized by category. On the bottom shelf (top picture) I have a small storage bin that I bought my freshman year of college that contains all of my hair and face products. I used to need an entire bin just for my hair stuff, but...

TIP #3: THROW IT AWAY! If you don't use it, get rid of it. I simply don't take the time to do my hair every day, so I purged myself of the vast amount of hair care products I'd been hoarding. Now I have one hairspray, one mousse, one leave-in conditioner, a finishing cream, and a heat protectant. And that's it. That is the extent of what I use on my hair. Well except for B&B, but that'll come up in a minute.

I also found this super cute cotton ball organizer at Target for about $5. The skinny side perfectly fit my makeup pads, and the fat side I used for good ole traditional cotton balls.

TIP #4: THRIFT AND RECREATE.  I have a super cute cow thing (I think maybe it's supposed to be a ring holder??) that I picked up at a Farmer's Market in Vienna for like 50 Euro Cents. It's my favorite thing in my bathroom, and I use it to hold cotton swabs. Give old things new life! 

TIP #5: PUT MOST-USED ITEMS IN AN EASY-TO-REACH PLACE. The second shelf (middle picture) has a drawer organizer that I did not, obviously, use in a drawer. It's see through and has three divided spaces. In this I put all the things I need easy access to, like my makeup wipes, moisturizer, perfumes, and the all important Bumble & Bumble Surf Spray. These are things that I use every day, so I put them where I could see them and grab them easily. 

I also have my makeup and combs on this shelf—more everyday things.

On the top shelf (bottom picture) I have the things I reach for the least. In a small set of organizing drawers, I have medicines that I don't take on a daily basis. Next to that I purchased a "bathroom tray" for around $5 from Target. On that I put some small makeup bags that contain makeup and hair samples, and a bowl I use to mix my Care by Chloe masks (shout out to her! If you're in Auburn, you HAVE to check out her all-natural beauty products at Mama Mocha's on Tichenor and at Day Spring!). 

TIP #6: KEEP YOUR SINK/COUNTER CLUTTER FREE. It's actually scientifically proven that mess and clutter makes you more stressed! My sink doesn't have a lot of surface area anyway, but I keep only things that I reach for when I'm actually using the sink on it. That includes my hand soap, face wash and face brush, and toothbrush. It just makes everything feel so tidy to have all the empty space! 

TIP #7: ADD YOUR OWN TOWEL RACKS. That way, the rack is exactly where you want it, and not in a weird place (such as inside the actual shower). I got this from Target for around $15, and my dad did the install in about ten minutes, no sweat. And the chrome finish matches my toilet shelves! 

TIP #8: KEEP THE BATHROOM WELL VENTILATED. Again, this is for anyone who lives in an older building. Most older buildings that do not have central air will also lack a ventilation fan (and air conditioning) in the bathroom. My advice is to leave the bathroom door open at all times when you're not using it to allow the cool air from the nearest window A/C to circulate, and place a fan in front of the window for when you shower. If you open the window, the fan will pull in all the fresh air and help disburse the steam faster. 

Honestly, I have not had any problems at all so far, and I had expected that the bathroom would be hot at all times. But the A/C air actually reaches it pretty well, and if I keep the fan on high, even my unreasonably hot and steamy showers (I use the hottest water possible) don't stick around for long! 

On to the linen closet!

This is where I am storing the majority of my makeup collection, my towels and sheets, laundry things, cleaning things, and replacements for the stuff stored in my bathroom (cotton balls, pads, and swabs, toothbrushes, etc. 

Side note: let me know in the comments here or on FaceBook if you want to see an in-depth makeup organization post, because I have a ton of makeup and reorganized it all pretty recently! 

TIP #9: USE BASKETS AND DRAWERS. These cute lil' blue babies from Target have been a lifesaver for the past year. They really are so versatile. You could even use one of the baskets to fold towels and washcloths in instead of using it for makeup like I did. You can also stack the drawers and baskets, depending on how high your shelves are, or you can put other things on top of them like I did here with feminine products and heat tools. 

TIP #10: REUSE GIFT CONTAINERS AS ORGANIZERS. The beautiful woven basket on the second shelf was originally a Valentine's Day gift from boyfriend and contained chocolates and a little stuffed dog that I named Mr. Ruffers (don't you judge me). But as soon as I had emptied it (it didn't take long) I saw how great of an organization tool it could be! In my dorm room, I used it for snacks and plastic silverware and plates. Now it holds all the replacement items. 

Again, I'm taking full advantage of the massive vertical space in this closet and stacking things almost to the ceiling. On the top shelf I put things I don't need that often, like travel makeup and wet bags, beach towels, a change of sheets, and first aid things. 


TIP #11: HANG IT. If you can't find a space for it, consider hanging it on the wall inside a closet. I hung my ironing board, my iron (in the silver bag), and my swiffer on the wall and it saves SO much space!! I would've hung my reusable swiffer as well, but it is, alas, unhangable. 

TIP #12: LEAVE ENOUGH SPACE TO WALK IN. Especially if you need to be able to reach high spaces, you will need a spot to put your step stool that gets you close enough to the shelf. Even leaving a space, though, I still had enough room for a storage box with household cleaners with my step stool stacked on top, a humidifier for those St. Louis winters, and extra toilet paper. Yew! 

And of course, we can't forget the famous "bag of other bags" that everyone has in their house. Now there exists cute grocery bag holders that aren't expensive, but I just haven't invested in one yet. So for now, they hang on the back of the linen closet door in another bag.

GRAND TOTAL: $55

Now, again, I had most of this stuff on hand already, but like I said in my last post, you can get great storage drawers and baskets at the Dollar Store that won't break the bank. Also, remember that one of my most-used organization things here was absolutely free (well, for me)! Don't be afraid to check out flea markets with an eye for rebirthing objects like jars, tins, and other knick-knacks. You may just find your favorite piece there :)

Until next time! 


Monday, August 4, 2014

Organization Log #1: Small closets

I am so excited to start a new series here on One of Those Days about organization! It's different from what I usually write, but I am so obsessed with organizing and having things neat that I figured I would share some tips with all my friends, many of whom I know have small living/storing spaces! 

Today I'm going to focus on the bedroom closet and front closet in my new apartment. Both of them are about the same size as the closets I had when I lived in the Quad at Auburn. Small. That is the size. Like, really small.

So, here's an overview of my bedroom: 

View of the bed from the doorway

Looking pretty similar to my last place, eh?

Looking straight into the room from the doorway

Looking toward the wall with the door


It's a cute little room, and it has two closets! Now, I am only using one, as boyfriend will be joining me in January. So here's my closet:


Itty bitty little baby. I was able to fit all of my clothes in here only because of my weight gain. All of my normal-sized Kelly clothes are in seven giant boxes in a larger storage closet in the living room. When I'm back to my normal size maybe I will write another post about this closet, because I will definitely have to re-organize. 


TIP #1: UTILIZE OVER-THE-DOOR HANGING STORAGE. I've had this shoe hanger forever. For anyone living in an older apartment with solid wood doors, they will be thicker than other doors, i.e.: anything made for over-the-door hanging won't work in this circumstance. Do not fear, friends, for there are command hooks. The strongest hooks they sell hold up to five pounds each. Use three of them  and you're good to go for those heavy shoe hangers. 

TIP #2: DOUBLE UP WHEN YOU CAN. Because I have a lot of shoes, I put one pair per pocket when I could. All my flats fit with both shoes in one pocket, but for my two pairs of oxford lace-ups, I had to separate them. But for flats and sandals, you can absolutely save space by doubling up! 

TIP #3: MAKE USE OF VERTICAL SPACE. Luckily for me, I have two deep shelves on top of my hanging rack, and I'm using both of them, even though they're pretty high up.


TIP #4: FLIP STORAGE CUBES ON THEIR SIDES FOR EASY-TO-SEE CLOTHING STORAGE. On the uppermost shelf I folded all of my winter shirts by category (over-shirt and thick sweaters, medium-thick sweaters and turtle necks, and thin long-sleeved shirts) in three 12-inch cubes. I did the same thing in my last place and loved it. You can easily see every shirt, and it looks super cute in the bins. I also put some of my hats on top of these bins. I need a step-stool to reach this shelf, but that's okay, because I was able to fit my clothes for ALL SEASONS in one tiny closet!

On the lower shelf, I was able to put two rows of heels—14 pairs total. I can reach the front row, barely, but I need the handy dandy step stool again for the back row. 

TIP #5: DON'T BE AFRAID TO BEND. USE THE FLOOR SPACE! 


Forgive the shakiness of this photo! I bought this four-tiered shoe rack from Target for $20. It was super easy to assemble, and holds up to 20 pairs of shoes! Yes, I do have so many shoes that I need an over-the-door hanger, a two-pair deep shelf, and a floor rack. And there are even more at my parent's house...

Because this little rack is pretty lightweight, the majority of the shoes I put on it are also lightweight. I put my heaviest sneakers on the bottom rack, and only put boots on the top because that's the only place they fit due to the majority of them being calf-high. The rest are sandals and slippers! 

Moving on to the front closet!


In this closet I have my Snow Queen costume (thank goodness I have a place to store my wig other than the kitchen table!), my winter coats and rain coats, accessories, and all my winter hats, gloves, and scarves. 


TIP #6: USE SHOWER CURTAIN HANGERS FOR ACCESSORIES! This is by far my favorite closet organization tip! Here I'm using them for my belts and bags, but you can also tie a scarf over it and it works like a charm. If you need to save more space, hang those suckers on a sturdy (preferably wooden) hanger instead of directly on the hanging rod. You can buy a pack of these at Target for a little more than a dollar.

TIP #7: BARGAIN HUNT FOR ORGANIZATION PRODUCTS. Both of the following items I purchased at the dollar store. You don't have to spend a whole lot to get quality items. If the dollar store had carried a shoe rack, I would have purchased that there as well! 


I picked up these ADORABLE baskets for $2 apiece. I used one for beanies, winter headbands, and gloves, one for my two earflap hats, and one for scarves that didn't fold well enough to put in these little boxes:


For my scarves that do fold easily, I put them in these boxes, which were $1 each at the dollar store. They are actually meant to be used as shoe boxes, but it fit my needs perfectly! I recommend getting a box that is see-through so that you can easily know which scarves are in what box and find them more quickly.

GRAND TOTAL: All of this cost me less than $30!! And I have a great-looking, well-organized space that is functional for me. 

Now, I did already own the storage cubes and shoe hanger, but I saw a three-pack of storage cubes for $6 at the dollar store, and you can find a shoe hanger for about $10, which would bring your grand total to $46. 

Let me know here or on Facebook if you like organization tips and if you want to see more, because I could talk about organization all day long! My bedroom was the first thing I organized, and up next are my bathroom, kitchen, office, and living room.

Hugs and Kisses to all my neat-freak friends! Until next time! 

Tuesday, June 24, 2014

The Great Apartment Hunting Adventure

Boyfriend and I went apartment hunting this past weekend. In case y'all don't know, I will be moving up to St. Louis August 1 because I'll be starting the MSW program at Washington University. So so so excited!

Forest Park


St. Louis is an awesome city. It has this cozy, homey feel, and yet it's still this huge place with skyscrapers and expensive parking and a zillion people (and a Macy's, thank god). The university is nestled on the Northwest side of Forest Park, which, imho, is 4,000 times more beautiful than Central Park could even wish to be. The neighborhood I decided I want to live in is called Demun, about a 15-minute walk south of WashU to the West of the park.

It. Is. Beautiful. Seriously. Tree-lined streets, quiet, adorable little coffee shop on the corner. I'm obsessed.

Demun


Now, because STL is a 10-hour drive from Auburn, boyfriend and I had to plan our trip and our apartment showings in advance. We had three showings scheduled: one on Saturday and two on Monday.

The first place we looked at was a condo high-rise with park views (if you rent a two-bedroom. Always read the fine print, guys). It had a big, clean laundry room and a bitchin' fitness facility in the basement, a doorman, and updated kitchens and bathrooms. It did not, however, have overhead lights. Which was very strange. It also had window AC, which is fine, but the bathroom was very far away from all of the AC units and thus I do not want to imagine how hot it would be in Summer. Actually, Winter is probably a bigger concern in MO. 

It was expensive though. Upwards of 1,000 a month for even the smallest unit on the lowest floor. Not great. But still an option when split between two people.

After we checked that place out, we made a pro and con list. You know me and my obsessive organization. Then, because it was only 11 a.m., we took a little tour around the city. We went to Soulard Market (not the best idea to visit a crowded outdoor market in 96 degree heat with 87% humidity, by the way), got ooey gooey butter cakes, hit up Ted Drewes for some frozen custard, and got mac n cheese in University City. Then we got sun death and went to bed at 8:30 and I forgot to call my dad on his birthday. I am the actual worst. 

And this is only one of the wings at the Soulard Market...

Ooey Gooey Butter Cake (yes, that's the real name)

Typical Ted Drewes line on a summer night


The showings on Monday proved much more interesting. We scheduled some showings with a realty company that my parents and I had checked out when we were in STL in April. They seemed really legit and had amazing apartments for reasonable prices. One of the apartments we wanted to view rented before we got to STL, but we still had one more to see.

So we arrived at 6219 Rosebury Ave at 8:45 for our 9:00 showing. Early to a fault, dude, always. The agent calls us at five till nine and says, hey, so the two-bedroom you wanted to see is actually rented. Which was super shitty news because we were, you know, sitting on the steps outside the building. But they said they could show us some more apartments, so we went up a block to meet them on Northwood Ave.

There, Mr. Hughes showed us a one-bedroom apartment that could fit, possibly—it would be tight, a midget and maybe one couch. We told Mr. Hughes that it didn't make sense to show us apartments that are half the square footage of what we told him we were looking for. He then told us that they only had one two-bedroom left and it was in another neighborhood. We figured, why not take a look?

Mr. Hughes offered to drive, which was super nice. Except that immediately upon entering his vehicle, we were high. His shiny, new, leather-seated cadillac REEKED of marijuana. 

Like, if you are a working professional and are going to offer to drive your clients to a destination, maybe don't hotbox your caddy, you know? 

He also wore loafers without socks. Just in case you were wondering bad this guy could really be. 

The he took us to an apartment that was so run down I could hardly believe it was standing. The kitchen was indescribably terrible. The floors creaked. The tile was cracked. It did have central air, so I guess that's nice.

It would have been nicer if they'd had it turned on for showings when it's nearly 100 degrees outside.

He then took us down to what boyfriend christened "the rape dungeon," wherein sat a few moldy washing machines, storage units that don't close properly, and the entrance to an underground parking garage. Now, the steps down to the garage were concrete and covered in water, and they ended in a large puddle that was deceptively deep. Boyfriend said, "That's dangerous. There should be a drain here." Mr. Hughes said, "Yeah.....I'll have to get someone to mop that up."

Here's the clincher. The apartment, with access to the rape dungeon and the slippery death stairs of doom, would run you $1,050 per month. Plus $50 per month to park in the garage. Plus $15 per month to use the security system that is already installed. Plus a $40 application fee. Plus a $20 cosigner fee. Plus a $30 fee for a background check. Plus gas, electric, and wifi.

Are. You. F*@#ing serious. 

Thanks for letting us ride dirty with you, dude, but no thanks.

So what DID we put down a deposit on?

An almost 1,000 square-foot two-bedroom convertible on Rosebury Ave for less than $900/month. It has no dishwasher, the oldest stove known to man, and a bedroom so tiny I might not be able to use the closet once my stuff is in there, but it's so charming and wonderful and the landlady is professional and super cool. She called and asked another tenant/friend if we could look through her apartment because they were doing work on ours and it was hard to walk through it. She reassured us that she would get another stove. She told us about the other tenants to reassure us that it was a quiet building. And if she was a raging pot head, at least she didn't smell like it. 

Our new place!!


Boyfriend and I in front of our new apt building

Thursday, June 12, 2014

The panic attack charlie horse puke fiasco

The Paleo experiment has ended, and boyfriend looks fabulous. I look about the same. Ah, to be a woman. Here are some things I learned about myself whilst on this food journey:

1. If your digestive system is already a little bit funky, a high-fiber diet is not your friend. It just really is not. Them veggies and nuts will get ya.

2. No matter how well you eat and how much you exercise, you will still feel crappy if you don't sleep enough.

3. Eating things with sugar in them after detoxing your body from all that badness results in a terrible, horrible, no good, very bad day.

Allow me to elaborate.

So yesterday was kind of a rough day at work. It was very busy and I was very sweaty and my feet felt like they were going to fall off. And I texted boyfriend and told him we should grab a drink after work. I also had eaten some very non-Paleo things that day. Then I got a vodka gimlet and a random dude bought me some fireball. Both sugary drinks.

Now, when you combine the sugary food and the sugary drinks, my blood sugar level spiked pretty hardcore. And when you have that much sugar after not having it in a while, it makes you pretty sick when it all comes crashing back down (I should also mention here that my blood sugar is pretty wacko anyway and I get hypoglycemic very easily).

So I woke up with this horrible combination of mild hangover, hypoglycemia, and I guess some weird kind of shock to my system from the sugar ingestion. And I think that is what it feels like to die.

Everything was more or less okay except for my stomach. When my blood sugar drops, I usually feel super nauseated, and I'm sure the alcohol didn't help. Here is where I tell you about a ridiculous phobia that I have. I do not know what it is called, so I call it vomi-phobia: the irrational fear of vomiting or being around vomit or just anything having to do with vomit.

And I felt verrrrry sick, so my phobia kicked in, which made me have a panic attack. Fabulous. So I watched some YouTube videos and sipped some water and overall tried to calm the hell down. This was all happening at about 6:30 this morning, by the way. 

I also attempted to eat some bread to settle my stomach, but only got about a quarter of the way through a piece.

After a while of watching videos, I started to feel hungry. Hooray! I thought, That usually means that the nausea is going away and that I should try and eat something again! Then I went to sit up to get out of bed and either I misread my tummy's signals or I don't remember the pre-vomit feeling anymore.

Regardless, it was happening. MY WORST FEAR. And as I was kneeling down on the little rug in front of my toilet like good ole Gustavo Fring and telling myself that it was going to be okay, I got a nice little surprise from my calves. It was a charlie horse. Oh happy day. So I'm simultaneously freaking out because of my dumb fear, dry heaving, and kicking around my right leg like a donkey, half-standing up, to take care of the stupid cramp.

It was basically just a really fun time.

It took me seven hours to finish that piece of bread. Seven. 

My calf is really sore.

And my throat feels like someone threw acid into it. I guess that's sort of kind of what happened. If by "someone" you mean "belly."

But my stomach has ceased to reject things, so that's nice. 


Saturday, May 3, 2014

On Becoming a Cave Man

Boyfriend and I have made a huge step! We have decided to, for 30 days beginning Monday, follow a Paleo diet and train for a 5K.

Why are we doing something so drastic??

It is because we have both gained lots of weight and because we have been eating super shittily and therefore feel terrible. I've gained about 60 pounds over the past year and a half, and I'm not actually sure how much boyfriend has gained, but the point is that we both have a body fat percentage that is way too high.

I usually sit at about a size 8 when I'm at my healthiest and my fat percentage is normal, and right now I'm a size 12-14. Not cool. Also my boobs went up...three sizes? Four? Two band sizes and two–three cup sizes—whatever that equates to. I don't have money to buy a whole new wardrobe, so I've been living off of three pairs of pants that I bought, a few dresses, and two bras. I cannot keep up this high frequency of doing laundry.

I may not lose all 60 pounds, but that's okay because I mostly want to get my body fat percentage back to normal so I don't inherit all the terrible diseases that run in my family (thanks mom and dad!). As long as I'm sitting at a good fat:muscle ratio, I don't particularly care about the number on the scale. Hopefully my old pants will still fit though, because as I mentioned I ain't got monies for clothes, but we'll see when we get there.

So, after the thirty days are up, I will be about halfway to being able to run (jog, probably, slowly) a 5K, and I hope my energy levels will increase and I will feel better overall once I cut out all the processed crap that America has decided will be the bulk of its food sales.

We're going to start adding back in dairy and grains at that point, mostly because a life without cheese is no life at all. But we still want to make sure we keep the preservatives and random ingredients to a minimum.

Huge thanks to Matt and I's lovely friends from choir for helping me out with choosing how I will eat for these initial 30 days, and thanks to Matt as well for being willing to be my partner in crime! It's always easier with someone else to support you.

Anyone have recipe suggestions? I'm mostly struggling with what to eat for lunch. I think I have my grocery list all set to go shopping tomorrow, but I will definitely need some help in the coming weeks...it would be much appreciated!

And to anyone who wants to return to the cave man days with us, let's do it!

I'll miss you, cheese. Until we meet again on June 4th. I'm not counting the days or anything.