If you've been keeping up with me on Facebook, then you may know that I've had some trouble with my teeth recently. I hadn't been to the dentist in two years because of my family's move to Chattanooga and my resulting laziness in finding a new dentist either at home or at school.
I finally made an appointment because one of my lower right molars had been hurting for a month or so, and it looked like it had a little hole in it. There's a dental office at the end of my street that I pass every day I go to school, so I figured I would call them. From the first phone call, there were so many signs that this was not the best dentist, and of course I ignored them. A synopsis:
Phone call: I call dentist about five minutes before they close to make an appointment. After we make the appointment, I apologize for calling so late. She says, "That's okay, I'm just happy I'll have something to do tomorrow."
Do you not usually have things to do? Just how many patients do you guys have?
First appointment: Get X Rays done. Dentist comes in, and before she even introduces herself, she says, "Well, it looks like you might need a root canal." Good. Fabulous start. Dentist also attempts to explain my dental situation using technical terms, and I stop her halfway through and say, "You're going to have to start over, because I did not understand anything you just said."
I'm a patient, dude. I don't know anything about dentistry (well, I do now, because I've researched it...but I didn't then). You gotta use layman's terms here.
She informs me that I have five teeth that need fillings.
I just realized that they never asked for X Rays from my previous dentist. I feel like that usually happens...am I crazy?
Second appointment: The goal is to fill all of the teeth on my right side. Dentist ends up having to give me three shots because I'm apparently very difficult to numb. She keeps making little quips about how I'm making it take forever, blah blah blah. We only get through one filling—the one that was hurting me.
Post-appointment, I'm in a little bit of pain. My jaw hurts and my tooth is really sensitive. So I call back and they tell me that this is normal, because keeping your mouth open for a long time and block injections will both cause soreness, and sensitivity can be expected for up to six weeks because of the amount of tooth that needed filling (it was a three-surface filling).
Why didn't you tell me that in the first place??
The receptionist says that the dentist should have told me to expect this, and to take some pain killers before the numbness goes away.
She did not. She did not tell me. I did not take pain killers. Well, I did, but not until way after the numbness was gone.
Third appointment: Dentist hits me in the lip with the needle while putting the syringe in my mouth, then blames this on me. She says, "Sometimes, if you don't open your mouth far enough, the needle can get caught." My lip begins to go numb.
Why didn't you ask me to open my mouth wider??
Fourth appointment: I wait for half an hour after my appointment time until Dentist finally comes in. She numbs me and leaves again to let it set in. While numbing, she begins talking to her assistant about getting drunk with her friends. Really?
Dentist also hits a capillary accidentally while numbing and tells me that I will be sore because the tissue is bruised now.
Wait another half an hour. Dentist finally comes back in and rushes through doing my last two fillings in half an hour. She doesn't wait for the numbing medication to fully set in on the bottom before beginning drilling. The cavity was shallow, so I didn't really feel anything, but it was still really weird. I didn't get fully numb until I was checking out.
Also, the assistant kept handing Dentist the wrong tools and things when she asked for them. This happened I think three times.
Before I go, I tell her that one of my teeth feels pokey, and she says, "Pokey? That's weird," like I'm making this shit up or something. But she looks and sees that it is indeed pokey and shaves it down a bit. It still feels kind of funny, like there's a weird edge to it, but it doesn't hurt or anything so whatever.
That brings us to today, when I was eating pretzels and then noticed that the formerly pokey filling was no longer there. There is currently a gaping hole on the inside surface of my top left back molar. I called the office and told them, and they couldn't get me in today.
I don't know why I called, because it's not like I'm ever going back to them, ever ever ever ever. I'm going to go to my family's dentist in Chattanooga on Friday, hopefully, if they can fit me in.
Until then, I have to chew on my right side and rinse every time I eat.
No worries. I'll just be chillin' here with my swiss cheese molar.
Wednesday, October 15, 2014
Friday, October 3, 2014
Just Call Me Lemony Snicket
Unbelievable. Insane. Ridiculous. Absolutely 100 percent
STUPID. These are all things I would use to describe the series of unfortunate
events that has occurred in my life over the past few weeks.
Let’s review.
3 weeks ago: Bitten by a brown recluse spider. Ankle swells
to twice its normal size. Takes a week to return to normal.
2 weekends ago: Robbed at gunpoint Saturday. In addition,
kitten pees on bed when I get home because I had moved his litter box too quickly.
Wash bedding Sunday. Email professors and receive extensions on papers. Do
nothing for several days. Get behind in all classes. Skip class Tuesday because
kitten again pees and poops on clothes and cannot deal with life. Soak clothes
overnight in enzyme solution and water and then launder on Wednesday.
Thursday, September 25: Birthday. Universe grants me a brief
grace period. Eat tacos. Drink margaritas. Play cards against humanity.
Generally have an excellent time.
Four days ago: Receive four more spider bites while studying
outdoors at coffee shop. One swells to the size of a doughnut. Not a doughnut
hole, the actual whole doughnut. Spend night icing thighs and fighting urge to
itch.
Today, 8:30: Wake up late. Eat cereal bar in car.
Today, 9:15: Park in city parking garage. Practicum interview
at 9:30. Interviewer is amazing and we spend three hours talking about random
shit. She offers me a practicum position (yay!). Forget about therapy
appointment at noon. Therapist says she will have to charge me. Also, it is 45
degrees and gusting wind and I am in a skirt.
Today, 12:30: Leave interview to get lunch before my 1:30
meeting. Tell parking garage attendant that my meeting went longer than expected and I only brought
enough cash for one hour. Attendant will not let me leave garage. Tells me I
must either find an ATM or call someone to bring me money. First incidence of
public crying. Find pizza restaurant and ask tearfully for ten dollars. Angel
man gives me ten dollars. Pay for parking. Forget receipt. Attendant brings me
receipt and opens gate, tells me to have a nice day. Do not look her in the
eyes. I am free.
Today, 1:15: Barely make it to meeting. No time to eat
lunch. Have not eaten in five hours. Cereal bar was digested at appx. 9:30.
Meeting lasts one hour. Cancel second practicum interview.
Today, 2:45: Arrive home. Eat chicken and rice. Put on
sweatpants. Watch Netflix. Planning on napping. Cat is acting funny. Smell
poop. Go to check litterbox, notice the closet door is shut. How long has it
been shut? Long enough for cat to pee thrice and poop once on comforter, which soaked through quilt, flat sheet, and fitted sheet. Thank goodness for my waterproof bed pad. Make mental note to self to close bedroom door when I am not home.
Today, 4:15: At Laundromat to once again wash cat waste out
of my bedding. Ask attendant if she has change for a 20 because machine does
not accept $20 bills. While she looks for change, the front door blows open due to horrific wind and
I go to close it. Somehow, wind blows large clock off wall. Clock falls and
hits me on top of the head. Second incidence of public crying. Attendant asks
if I need medical assistance. I tell her I’ve just had a rough day.
The universe is testing
me. And I am failing.
Sunday, September 21, 2014
A Split Second
There's a moment before a trauma happens when you know that something terrible is about to occur. I felt it last year when I was hit by a car (Read about that shit here: OOTD Log: The Time I got Struck by a Vehicle), and I felt it last night, when I was robbed at gun point on a typically safe street in St. Louis.
Last night, Saturday, September 20, 2014 at 10:50 p.m., I was outside of my friend Lexie's apartment building in Central West End. We were with our friend Brian and had stopped by Lexie's place so I could change shoes before we went to Oktoberfest at the Urban Chestnut brewery downtown.
We decided to take Brian's car to Oktoberfest, so I went to put my stuff in my car and told them I would meet them back at Brian's car, which was just around the corner from mine. Brian had gone out to the patio of Lexie's building, so she went to get him while I went to my car.
I got back to Brian's car before they did. No big deal. I had seen them walking back inside from the patio and knew they would be there in less than a minute. A man walked up behind me and said, "How are you doing tonight?" He was a tall black man and my initial response was fear, but I told myself, Kelly, you don't know that he's not just a guy walking back from a bar or a restaurant, so try to stay calm. And I said, "I'm fine, how are you?"
That's where my split second occurred. I knew in that moment, right after I responded to him, that something was about to happen. And then suddenly, there was a gun two inches from my forehead and he was saying, "This is a robbery. Give me your purse." I screamed and he said, "Shut up." I looked down at the ground and threw my purse at him. He began walking away but then turned back and said, "Take your shoes off, bitch. Take them off!" I did as he said and then he went on, "Kick them over there." And I did.
Then he walked away calmly. Apparently, Brian and Lexie had heard me scream and began walking faster to get to the stairs that lead down to the sidewalk, where they saw the man walking away with my purse. He pointed the gun at them, cocked it, and said, "I just robbed your friend."
I didn't hear or see any of this, because I had immediately begun hyperventilating and crying. Lexie and Brian somehow remained calm enough to call 911 and help me to slow down my breathing.
The police got there in about 5-10 minutes, which seemed like a lifetime. They were amazingly helpful and so sweet, and made us comfortable and made us laugh. Because I have the "Find my iPhone" feature enabled, they were able to locate my purse, which was about five houses down the street in some bushes. Amazingly, it still had everything in it except for the approximately $8 in cash that I was carrying at the time.
They dusted it for prints, swabbed my cheek, and walked me back to where Brian and Lexie were standing, now accompanied by my other good friends, Taylor and Danielle, whom I had asked Brian to call.
I called my parents and my boyfriend, who were obviously upset by the news, but we stayed in touch all night as I calmed down, so hopefully they calmed down a bit as I did. Lexie and Brian stayed with me last night, which I appreciate more than words can express because I so did not want to be alone.
There have been a few times on this blog of mine that I've said something was the scariest thing that's ever happened to me, or that I had the worst night of my life. This was without a doubt, one hundred percent the most scared I have ever been. I'm shaking even as I type and recount this. I remember it in snapshots—the moment I knew this man was not just another pedestrian, the whoosh of the gun as he held it up to my face, gripping a street pole and collapsing to the ground in terror and disbelief at what had just happened.
I am so unbelievably lucky to have found such a great support system here so quickly. I don't know what I would have done without my friends. To Lexie, Taylor, and Brian, you guys are my heroes and I am so so grateful for your help and concern and support. To Lexie and Brian, I do not discount the trauma that you experienced. Just because the gun was farther away from you doesn't mean it's not still a gun that was pointed at you. And thank you for staying with me last night.
I hope that they find this guy, and I hope I get to talk to him. I want to know his story and why he held a gun to a young woman's face and asked for her purse in an era when people typically carry credit cards instead of cash. I want to know what he did with those $8. I wonder if he is an addict or if he just steals, because he seemed so methodical and calm, like he's done this many times before. I wonder where he was hiding, because I didn't see him until he was right next to me. I want to know why he made me take my shoes off when I could run better barefoot. I want to know how he knew that Brian and Lexie were my friends.
But bottom line is, I'm okay. I swear to god I thought he was going to shoot me, but he didn't. Who knows if the gun was even loaded? I had trouble falling asleep, but my sweet kitten (I think it's so amazing how animals can sense when you're upset) curled up on my chest, put his head next to mine, and stayed there until I fell asleep.
And that, friends, is the very true, very real story of that one time I got mugged in St. Louis.
Friday, August 8, 2014
Organization Log #4: BACK TO SCHOOL!!!
It's my favorite time of year! Back-to-school shopping is my favorite shopping. You get to see all these pretty things, and you don't even have to try them on before you buy them! It's just the best. And I only get to do this for two more years, so I have to make it count!
I've always been really good at organizing myself for school, and at keeping up with it throughout the school year. So these are probably going to be my best organization tips out of any that I've done so far. I'm a pro at this, guys! Let's start with some supplies.
My go-to's are colorful pens and highlighters, a good planner, and sturdy notebooks. And really, I like all of these things to be colorful.

TIP #1: USE COLORFUL WRITING UTENSILS. This makes note taking so much fun, and you can separate your colored notes by subject or day and find them so easily. Check it out.

I change pen color every time we start a new chapter or subject in each class. I get so weirdly excited about looking at my beautiful notes. Now, when I'm taking notes in class I only use a yellow highlighter, because it shows up well on all of my colored pens. I highlight what seems important.
When I'm studying for an exam, I then look over my notes and rewrite the things I need to remember in black pen, then highlight things in different colors for different categories.

For example, in this class I used three different colors to denote which sections were from the professor's study guide, and which were from my notes or from the textbook. That way I could easily cross reference, and it also helped me rank which sections were most important (obviously the stuff from the study guide, as the professor gave it to us herself).
TIP #2: A GOOD PLANNER IS A MUST. I know a lot of people use their phones or email or whatever, but for me, I've always been about dat agenda. Physically writing a task down is associated with better recall of that task later (this goes for note taking too, for all you laptop note takers out there—you remember the info better if you write it down!).

I love the Lilly Pulitzer planner, which is very, ironically, sorority girl of me. But I have used every agenda out there ever. Seriously. Day runner, day planner, everything, and this is the only one I will be repurchasing.
A good planner has several qualities. First of all, it needs pockets in the front in case you have something you need to stick in there quickly. Second, it needs both a monthly and a daily planner section. Third, it needs a notes section. This planner has all of those, with plenty of room for writing.

I use paper clips to mark where I am in my notes, in my monthly planner, and in my daily planner (so three total). I also color code my events based on whether they are for class, for extra curriculars, for appointments, or social. August is looking pretty spare right now. Until we get to orientation week.


I used the multicolor highlighter trick here as well, to denote which orientation events are required vs. the events that were optional that I registered for. And it's so neat and easy to read! As for the notes section, I use that mostly for grocery lists, or any kind of list really. This year I've used it to make a packing list to move and to make a grad school application to-do list. I love having everything in one place!
On to notebooks. Are you a notebook or a binder user? I used binders throughout high school, but switched to notebooks in undergrad because I didn't want all the extra weight if I were going to be walking farther.
TIP #3: USE REFILLABLE NOTEBOOKS. But notebooks are not reusable, right?

WRONG! Enter these beauties, which are by Five Star, and which I purchased THREE YEARS AGO, and they are still in perfect condition. They are sort of like a binder-notebook hybrid, and come in all sorts of fun colors (or black for you lame-oes out there). They are refillable, but much lighter than a binder. The downside is that they have no pockets, but you can buy insertable pockets for them!
Weirdly enough, this is the best investment I have made, as my binders usually got so beat up in high school that I had to replace them every year anyway like I would have with a notebook. And the three-ring closures on these are rubber, so no more worrying about pinching your finger in those nasty metal ones.
TIP #4: HAVE FUN WITH LABELING. With a binder, there was always the option to slide decorative paper in the front with cute hand lettering on there, but no such luck with notebooks. To label mine, I write the subject on printer paper in a metallic sharpie, then tape all four sides down. If I had easy access to cuter paper, I would totally make this more adorable. But it's still sorta cute, right?
TIP #5: USE REINFORCED NOTEBOOK PAPER. Maybe I'm just unnecessarily violent with my notes, but I swear there are always several pages that come completely out of the rings over the semester. And who wants to individually reinforce all three holes on each sheet of paper? No one. Luckily, someone threw a bone to the lazy people by inventing paper that is pre-reinforced. Score!

Let's move on to the desk area.
TIP #6 PART 1: SURROUND YOURSELF WITH FUNCTIONAL THINGS THAT KEEP YOU ON TASK... Here I have yet another calendar so that if my planner is in my backpack or whatever, I can still see at a glance what I have to do in the next few days.


I also like this little plain whiteboard where I can hang inspirational quotes or jot down something I need to do later.
TIP #6 PART 2: BUT ALSO SOME THINGS THAT ARE JUST FUN. It's nice to be able to look over and see something that will put a smile on your face when you're in the middle of a not-so-fun study sesh. Enter bulletin boards!


I filled my bulletin boards with magazine and newspaper clippings, mementos, doodles, and ticket stubs. Each one of them has a memory attached to it that gives my poor tired brain a nice break from working. My favorite things on my bulletin boards is a comic that shows two adult Kool Aid pitchers having dinner looking proud while their baby Kool Aid runs around wrecking things. This makes me crack up every. Single. Time.
I'm so excited to begin graduate school. It seems like it'll be really hard, but studying and staying organized is always something that I've been good at, and something that has helped me maintain good grades. Nothing is a substitute for good note taking and study skills, and I hope that some of my tips can help you improve yours if you're struggling, or inspire you to add to them if you're not.
This concludes my organization series! Thanks for sticking with me while I tried out something new :)
Thursday, August 7, 2014
Organization Log #3: Small Kitchen

But it's just so dang adorable. Even if you don't have a kitchen made for ants, these tips will work in any kitchen!

I got these gloves from Schnuck's (yes, that is a real name of a real grocery store for all my southern friends out there. Where is the Kroger?? Where is the Publix??), and they are so cute, inexpensive, and functional! I always buy Scotch-brite heavy duty sponges because they have a soft side and a scrubby side (using technical terms here), and they won't break the bank like some of the more decorated sponges. I also exclusively buy Dawn foaming dish soap after using it and loving it at my parent's house. It lasts for freaking ever, and who doesn't love a foamy soap?? It's the simple things, guys.
For anyone who doesn't have a dishwasher or who has lots of dishware that requires hand washing, I would highly recommend a memory foam drying mat. They're washable, better looking than laying out a hand towel, and they absorb enough water that you never have to worry about it leaking through. My mom got me one as a gift for my first apartment, and I used it sooo much.
Unfortunately, I don't have enough counter space to lay it out here, at least not every day, so I invested in an in-sink dish drying rack from Bath and Body Works. In my opinion, they had a better selection than Target did. And it was nine bucks, people. NINE. And it has a nice little utensil holder and plenty of room for plates, pots, pans, and glasses. Oh yes.
.JPG)

TIP #3 PART 2: ...UNLESS YOU HAVE RIDICULOUS AMOUNTS OF ANY ONE THING. In my case, that would be tea.
.JPG)
This cabinet is not nearly as pretty as the other one, but I know my tea collection well enough to not get stressed out by this madness. I also wanted it all in one place for ease of use. So as we see, there are exceptions to every rule. Anyone else a tea addict?
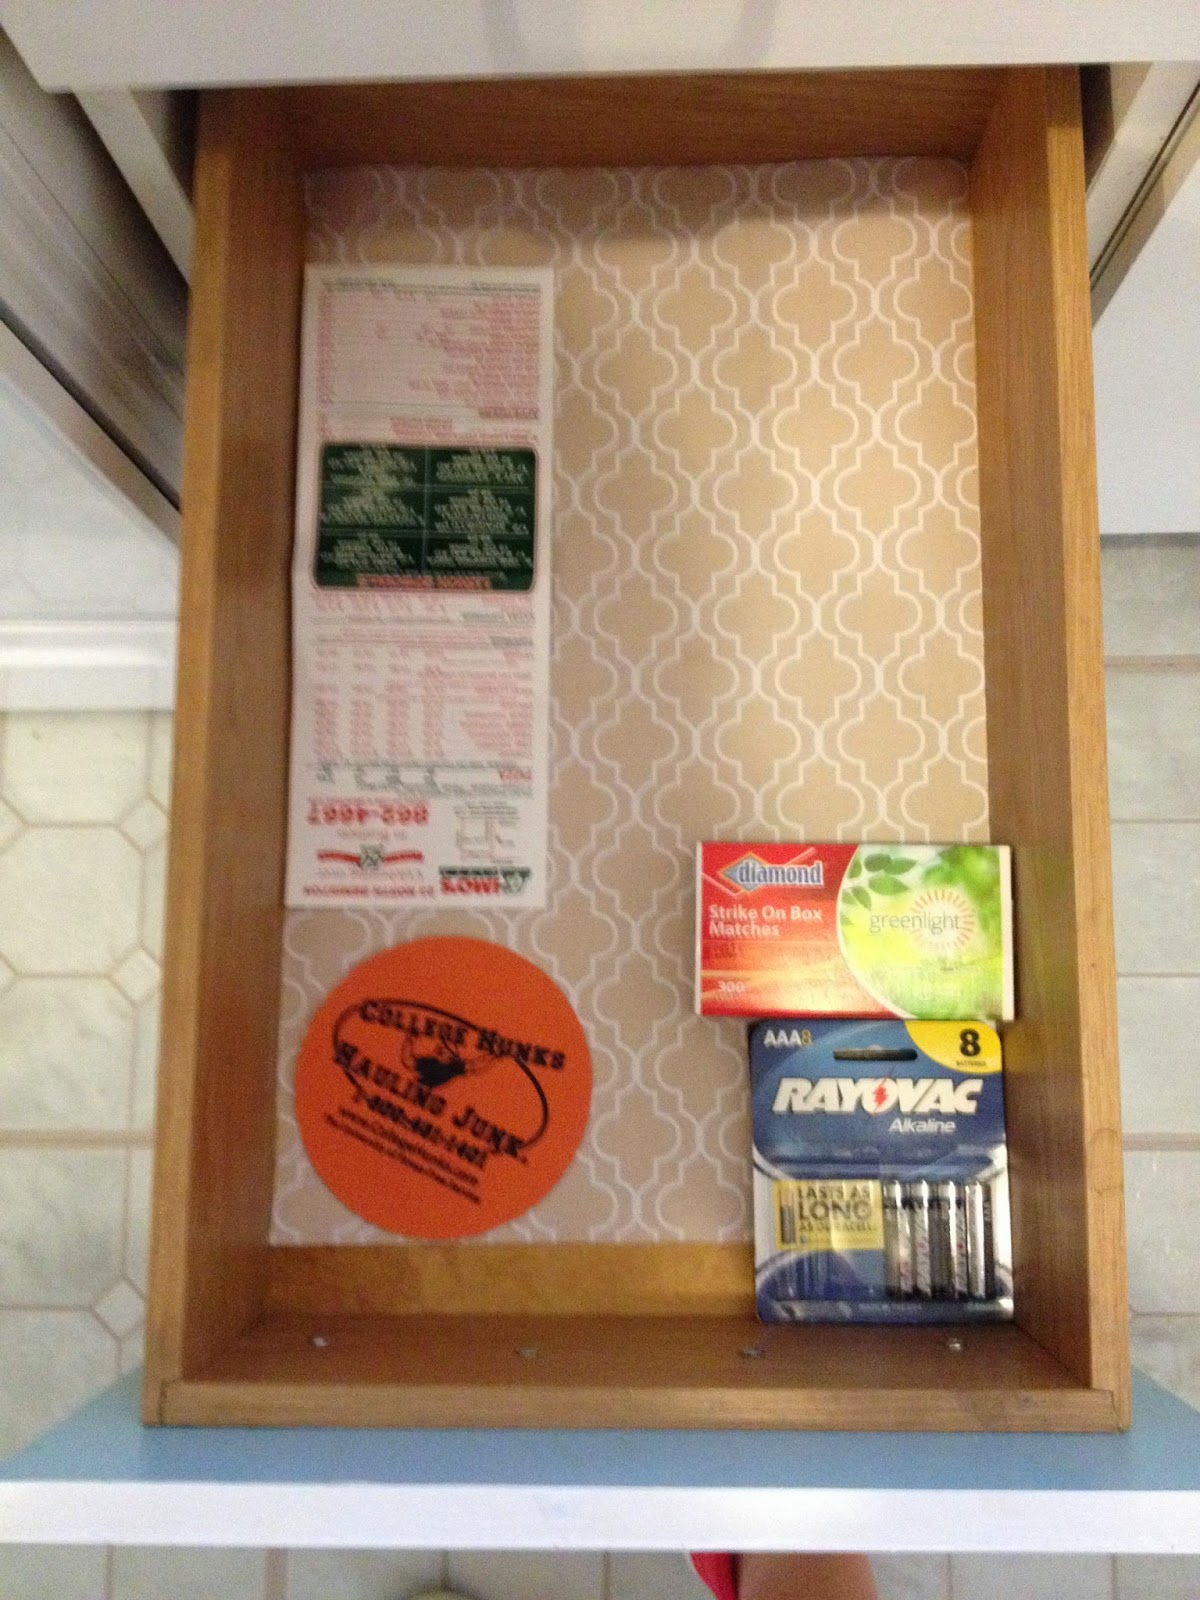
TIP #4: USE SHELF PAPER. A lot of times, especially in super old buildings from the 1920s, drawers and cabinets can get pretty worn and nasty looking. Enter shelf paper, which does not necessarily have to have an adhesive back, and which (apparently) comes in scents...I stuck with good ole non-scented, but regardless, this just gives you a nice clean base upon which to lay your utensils and knives and, you know, batteries and matches and takeout menus.

Okay, so let's dive into my pantry, which, thank JEEBUS, is actually quite large.
TIP #5: PUT THE HEALTHY STUFF ON EYE LEVEL. You may have to enlarge the picture to see, but the eye-level shelf has veggies, soup, and healthy snacks. In my case, that means lots of almonds and kind bars, and a large variety of canned vegetables and Cambell's soups. Yum :)
Along the same lines, I put all the carb-y terrible things on the top shelf. Out of sight, out of mind right? Hah, like I ever forget about macaroni and cheese.
TIP #6: PANTRY DOES NOT HAVE TO BE "FOOD ONLY." That will probably mean something different for everyone. For me, it means that everything that didn't fit in my ant-kitchen goes in here, because I have tons of space. My toaster, which I don't use very often, tupperware, alcohol, and measuring and cooking spoons all live in the pantry. They can even *gasp* share a shelf! I know, I'm a mad man. I am also keeping my tools in here (in the shoe box next to the toaster) because it's just an easy-access spot in my apartment.
That's it for today friends! No real "grand total" here, because it's mostly made up of things you'll already have for your kitchen. Look out for a very exciting back-to-school organization post, which I will likely lump in with my office organization. Does anyone else love back-to-school time as much as I do?? Even as a grad student, I am still getting excited. CAN SOMEONE GET ME TO A STAPLES IMMEDIATELY PLEASE.
Till next time...
Tuesday, August 5, 2014
Organization Log #2: Small Bathroom, Linen Closet
Welcome back to my organization series! Today, we're going through my bathroom and linen closet.
Weirdly enough, even though my apartment is huge, there are a lot of small spaces in it. Many of the closets are large, which is absolutely fabulous, but the kitchen, bathroom, and bedroom are all teeny tiny. So here we go with some more small space organization...

Any over-the-toilet storage is going to be a little more expensive, but to me it's worth it because I can definitely use the extra space! Not sure how intense this assembly was, as boyfriend and dad put it together, but I didn't hear any yelling or cursing, so my guess is it wasn't so bad!


TIP #2: SPLIT UP BELONGINGS INTO SMALLER BINS IF POSSIBLE. Having loose things just lying around stresses me out. I like to have them all contained and organized by category. On the bottom shelf (top picture) I have a small storage bin that I bought my freshman year of college that contains all of my hair and face products. I used to need an entire bin just for my hair stuff, but...
TIP #3: THROW IT AWAY! If you don't use it, get rid of it. I simply don't take the time to do my hair every day, so I purged myself of the vast amount of hair care products I'd been hoarding. Now I have one hairspray, one mousse, one leave-in conditioner, a finishing cream, and a heat protectant. And that's it. That is the extent of what I use on my hair. Well except for B&B, but that'll come up in a minute.
I also found this super cute cotton ball organizer at Target for about $5. The skinny side perfectly fit my makeup pads, and the fat side I used for good ole traditional cotton balls.
TIP #4: THRIFT AND RECREATE. I have a super cute cow thing (I think maybe it's supposed to be a ring holder??) that I picked up at a Farmer's Market in Vienna for like 50 Euro Cents. It's my favorite thing in my bathroom, and I use it to hold cotton swabs. Give old things new life!
TIP #5: PUT MOST-USED ITEMS IN AN EASY-TO-REACH PLACE. The second shelf (middle picture) has a drawer organizer that I did not, obviously, use in a drawer. It's see through and has three divided spaces. In this I put all the things I need easy access to, like my makeup wipes, moisturizer, perfumes, and the all important Bumble & Bumble Surf Spray. These are things that I use every day, so I put them where I could see them and grab them easily.
I also have my makeup and combs on this shelf—more everyday things.
On the top shelf (bottom picture) I have the things I reach for the least. In a small set of organizing drawers, I have medicines that I don't take on a daily basis. Next to that I purchased a "bathroom tray" for around $5 from Target. On that I put some small makeup bags that contain makeup and hair samples, and a bowl I use to mix my Care by Chloe masks (shout out to her! If you're in Auburn, you HAVE to check out her all-natural beauty products at Mama Mocha's on Tichenor and at Day Spring!).

TIP #6: KEEP YOUR SINK/COUNTER CLUTTER FREE. It's actually scientifically proven that mess and clutter makes you more stressed! My sink doesn't have a lot of surface area anyway, but I keep only things that I reach for when I'm actually using the sink on it. That includes my hand soap, face wash and face brush, and toothbrush. It just makes everything feel so tidy to have all the empty space!

TIP #7: ADD YOUR OWN TOWEL RACKS. That way, the rack is exactly where you want it, and not in a weird place (such as inside the actual shower). I got this from Target for around $15, and my dad did the install in about ten minutes, no sweat. And the chrome finish matches my toilet shelves!

TIP #8: KEEP THE BATHROOM WELL VENTILATED. Again, this is for anyone who lives in an older building. Most older buildings that do not have central air will also lack a ventilation fan (and air conditioning) in the bathroom. My advice is to leave the bathroom door open at all times when you're not using it to allow the cool air from the nearest window A/C to circulate, and place a fan in front of the window for when you shower. If you open the window, the fan will pull in all the fresh air and help disburse the steam faster.
Honestly, I have not had any problems at all so far, and I had expected that the bathroom would be hot at all times. But the A/C air actually reaches it pretty well, and if I keep the fan on high, even my unreasonably hot and steamy showers (I use the hottest water possible) don't stick around for long!
On to the linen closet!

This is where I am storing the majority of my makeup collection, my towels and sheets, laundry things, cleaning things, and replacements for the stuff stored in my bathroom (cotton balls, pads, and swabs, toothbrushes, etc.
Side note: let me know in the comments here or on FaceBook if you want to see an in-depth makeup organization post, because I have a ton of makeup and reorganized it all pretty recently!
TIP #9: USE BASKETS AND DRAWERS. These cute lil' blue babies from Target have been a lifesaver for the past year. They really are so versatile. You could even use one of the baskets to fold towels and washcloths in instead of using it for makeup like I did. You can also stack the drawers and baskets, depending on how high your shelves are, or you can put other things on top of them like I did here with feminine products and heat tools.
TIP #10: REUSE GIFT CONTAINERS AS ORGANIZERS. The beautiful woven basket on the second shelf was originally a Valentine's Day gift from boyfriend and contained chocolates and a little stuffed dog that I named Mr. Ruffers (don't you judge me). But as soon as I had emptied it (it didn't take long) I saw how great of an organization tool it could be! In my dorm room, I used it for snacks and plastic silverware and plates. Now it holds all the replacement items.

Again, I'm taking full advantage of the massive vertical space in this closet and stacking things almost to the ceiling. On the top shelf I put things I don't need that often, like travel makeup and wet bags, beach towels, a change of sheets, and first aid things.


TIP #11: HANG IT. If you can't find a space for it, consider hanging it on the wall inside a closet. I hung my ironing board, my iron (in the silver bag), and my swiffer on the wall and it saves SO much space!! I would've hung my reusable swiffer as well, but it is, alas, unhangable.

TIP #12: LEAVE ENOUGH SPACE TO WALK IN. Especially if you need to be able to reach high spaces, you will need a spot to put your step stool that gets you close enough to the shelf. Even leaving a space, though, I still had enough room for a storage box with household cleaners with my step stool stacked on top, a humidifier for those St. Louis winters, and extra toilet paper. Yew!

And of course, we can't forget the famous "bag of other bags" that everyone has in their house. Now there exists cute grocery bag holders that aren't expensive, but I just haven't invested in one yet. So for now, they hang on the back of the linen closet door in another bag.
GRAND TOTAL: $55
Now, again, I had most of this stuff on hand already, but like I said in my last post, you can get great storage drawers and baskets at the Dollar Store that won't break the bank. Also, remember that one of my most-used organization things here was absolutely free (well, for me)! Don't be afraid to check out flea markets with an eye for rebirthing objects like jars, tins, and other knick-knacks. You may just find your favorite piece there :)
Until next time!
Monday, August 4, 2014
Organization Log #1: Small closets
I am so excited to start a new series here on One of Those Days about organization! It's different from what I usually write, but I am so obsessed with organizing and having things neat that I figured I would share some tips with all my friends, many of whom I know have small living/storing spaces!
It's a cute little room, and it has two closets! Now, I am only using one, as boyfriend will be joining me in January. So here's my closet:


Today I'm going to focus on the bedroom closet and front closet in my new apartment. Both of them are about the same size as the closets I had when I lived in the Quad at Auburn. Small. That is the size. Like, really small.
So, here's an overview of my bedroom:
 |
| View of the bed from the doorway |
 |
| Looking pretty similar to my last place, eh? |
 |
| Looking straight into the room from the doorway |
 |
| Looking toward the wall with the door |
It's a cute little room, and it has two closets! Now, I am only using one, as boyfriend will be joining me in January. So here's my closet:
Itty bitty little baby. I was able to fit all of my clothes in here only because of my weight gain. All of my normal-sized Kelly clothes are in seven giant boxes in a larger storage closet in the living room. When I'm back to my normal size maybe I will write another post about this closet, because I will definitely have to re-organize.
TIP #1: UTILIZE OVER-THE-DOOR HANGING STORAGE. I've had this shoe hanger forever. For anyone living in an older apartment with solid wood doors, they will be thicker than other doors, i.e.: anything made for over-the-door hanging won't work in this circumstance. Do not fear, friends, for there are command hooks. The strongest hooks they sell hold up to five pounds each. Use three of them and you're good to go for those heavy shoe hangers.
TIP #2: DOUBLE UP WHEN YOU CAN. Because I have a lot of shoes, I put one pair per pocket when I could. All my flats fit with both shoes in one pocket, but for my two pairs of oxford lace-ups, I had to separate them. But for flats and sandals, you can absolutely save space by doubling up!
TIP #3: MAKE USE OF VERTICAL SPACE. Luckily for me, I have two deep shelves on top of my hanging rack, and I'm using both of them, even though they're pretty high up.
TIP #4: FLIP STORAGE CUBES ON THEIR SIDES FOR EASY-TO-SEE CLOTHING STORAGE. On the uppermost shelf I folded all of my winter shirts by category (over-shirt and thick sweaters, medium-thick sweaters and turtle necks, and thin long-sleeved shirts) in three 12-inch cubes. I did the same thing in my last place and loved it. You can easily see every shirt, and it looks super cute in the bins. I also put some of my hats on top of these bins. I need a step-stool to reach this shelf, but that's okay, because I was able to fit my clothes for ALL SEASONS in one tiny closet!
On the lower shelf, I was able to put two rows of heels—14 pairs total. I can reach the front row, barely, but I need the handy dandy step stool again for the back row.
TIP #5: DON'T BE AFRAID TO BEND. USE THE FLOOR SPACE!
Forgive the shakiness of this photo! I bought this four-tiered shoe rack from Target for $20. It was super easy to assemble, and holds up to 20 pairs of shoes! Yes, I do have so many shoes that I need an over-the-door hanger, a two-pair deep shelf, and a floor rack. And there are even more at my parent's house...
Because this little rack is pretty lightweight, the majority of the shoes I put on it are also lightweight. I put my heaviest sneakers on the bottom rack, and only put boots on the top because that's the only place they fit due to the majority of them being calf-high. The rest are sandals and slippers!
Moving on to the front closet!
In this closet I have my Snow Queen costume (thank goodness I have a place to store my wig other than the kitchen table!), my winter coats and rain coats, accessories, and all my winter hats, gloves, and scarves.
TIP #6: USE SHOWER CURTAIN HANGERS FOR ACCESSORIES! This is by far my favorite closet organization tip! Here I'm using them for my belts and bags, but you can also tie a scarf over it and it works like a charm. If you need to save more space, hang those suckers on a sturdy (preferably wooden) hanger instead of directly on the hanging rod. You can buy a pack of these at Target for a little more than a dollar.
TIP #7: BARGAIN HUNT FOR ORGANIZATION PRODUCTS. Both of the following items I purchased at the dollar store. You don't have to spend a whole lot to get quality items. If the dollar store had carried a shoe rack, I would have purchased that there as well!
I picked up these ADORABLE baskets for $2 apiece. I used one for beanies, winter headbands, and gloves, one for my two earflap hats, and one for scarves that didn't fold well enough to put in these little boxes:
For my scarves that do fold easily, I put them in these boxes, which were $1 each at the dollar store. They are actually meant to be used as shoe boxes, but it fit my needs perfectly! I recommend getting a box that is see-through so that you can easily know which scarves are in what box and find them more quickly.
GRAND TOTAL: All of this cost me less than $30!! And I have a great-looking, well-organized space that is functional for me.
Now, I did already own the storage cubes and shoe hanger, but I saw a three-pack of storage cubes for $6 at the dollar store, and you can find a shoe hanger for about $10, which would bring your grand total to $46.
Let me know here or on Facebook if you like organization tips and if you want to see more, because I could talk about organization all day long! My bedroom was the first thing I organized, and up next are my bathroom, kitchen, office, and living room.
Hugs and Kisses to all my neat-freak friends! Until next time!
Subscribe to:
Posts (Atom)